Basic Blocks | Minecraft 1.19
Published on
10 min read
Part 3 of 5
In this tutorial we will continue off from where we got to in the previous tutorial and add some new basic blocks to Minecraft. They are “basic” blocks because they will not have any logic tied to them, we will cover such blocks later on as part of a “advanced blocks” tutorial.
What blocks are we adding?
To make future tutorials easier later on and to build on from the previous tutorial, we will add some blocks now that we can use late ron. Let’s add the following blocks to our mod and explore what we may want them for later on.
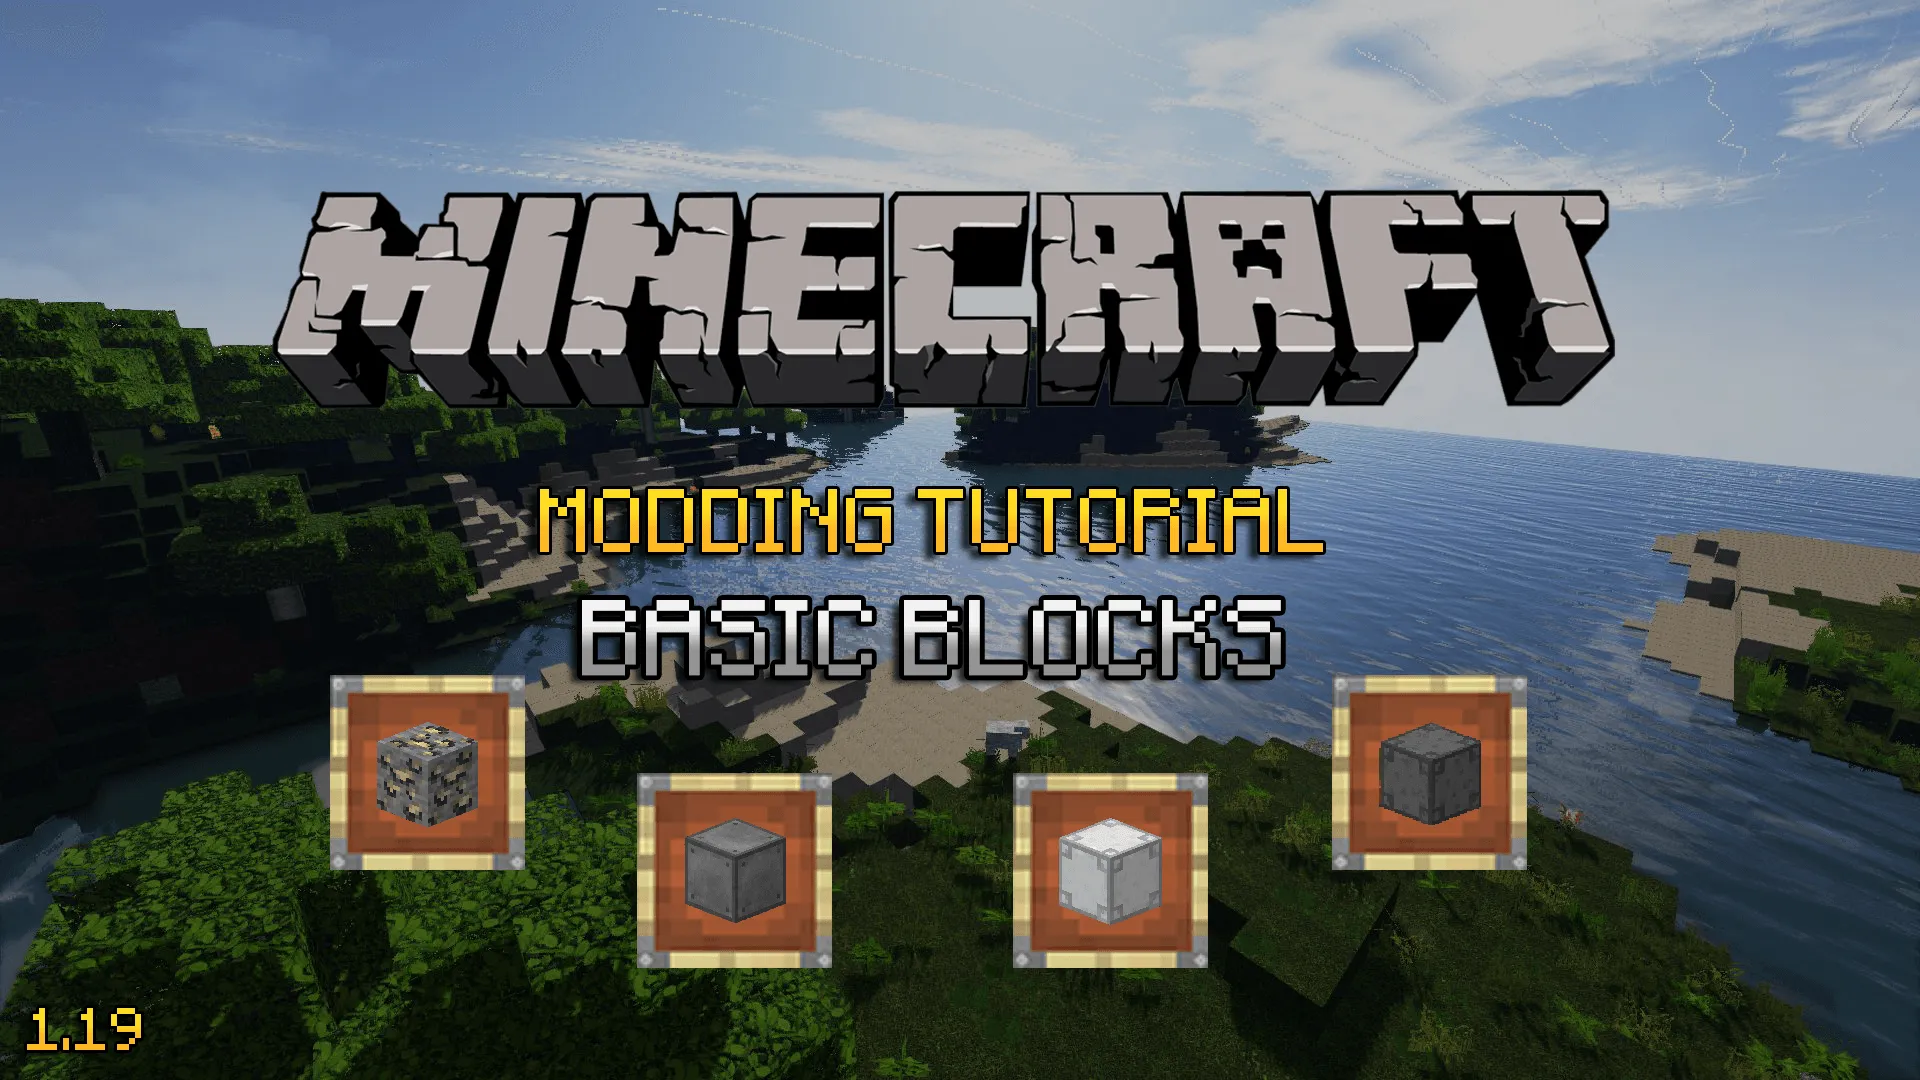
- Coal infused iron ore
- Steel block
- Iron frame
- Steel frame
As there will be a future tutorial to cover world ore generation, we will add a new coal infused iron core which is essentially going to be a ore that is a combination of iron and coal, when we put it through our future crushing machine it will give us iron dust and coal dust. The steel block is just like the iron block as part of the base game, we will be able to convert 9 steel ingots into a block of steel and via versa. The iron frame and steel frame blocks will be used as part of the recipes for our advanced machine blocks later, such as the crushing machine.
Just as we did previously, we’ll add these new blocks and make them accessible in the game via our new creative mode tab. In future tutorials we will look at loot drop tables (which tells the game what items to drop when the blocks are mined) and ore generation (tells the game how to generate our ores within the world like iron ore does).
Concepts
Each type of block in Minecraft is represented by an instance of the Block class. Just like items, the variables and methods on your block class are shared by that type of block in general, not specific to individual blocks in your inventory or within the world. Basic traits for your block can be set with a block properties object, but more complex traits and behaviours will require custom block classes that extends Block; this is something we will look at in the near future.
Adding a new block
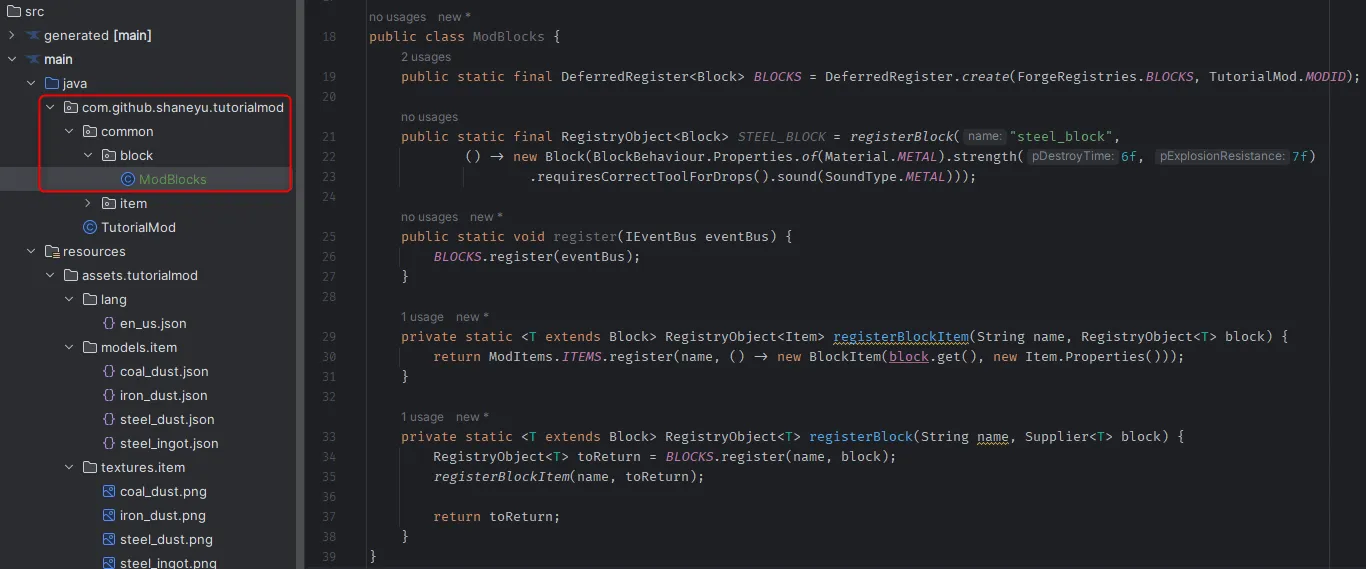
Just as we needed to with items, we will need to create a register for our custom blocks and register each one of them with it in order for the game to know about them. Let’s start off by creating a new package under the common package named block and within there a new Java class named ModBlocks.
The content for this file will be quite similar in the way in which we will create a deferred register for the blocks, each block will be defined as a properties just as we did with our items and there will be a register method again. However we will also include some helper methods to aid with registering our blocks, the reason for this is that for each block we register we also need to register a block item.
A block itself cannot be held or put into your inventory, it requires a item that represents the block; the helper methods will automatically register a item that represents our blocks for us.
public class ModBlocks {
    public static final DeferredRegister<Block> BLOCKS = DeferredRegister.create(ForgeRegistries.BLOCKS, TutorialMod.MODID);

    public static void register(IEventBus eventBus) {
        BLOCKS.register(eventBus);
    }

    private static <T extends Block> RegistryObject<Item> registerBlockItem(String name, RegistryObject<T> block) {
        return ModItems.ITEMS.register(name, () -> new BlockItem(block.get(), new Item.Properties()));
    }

    private static <T extends Block> RegistryObject<T> registerBlock(String name, Supplier<T> block) {
        RegistryObject<T> toReturn = BLOCKS.register(name, block);
        registerBlockItem(name, toReturn);

        return toReturn;
    }
}
When we register a block we will use the helper method registerBlock which will then call the registerBlockItem helper method, this in turn registers a new block item with our ITEMS register in the ModItems class we created last time. Also note that because our main mod class is automatically add all or our items with the creative mode tab we created, these new block items will also be added; see how useful that was!
Take note within the code that we’re defining a property called BLOCKS this time, the register objects are of type Block and the forge register the deferred register is being created for is the ForgeRegistries.BLOCKS rather than ForgeRegistries.ITEMS.
We can now register our steel blokc, but what if we are unsure what properties or values to use, here is a good tip. Every block in Minecraft has been registered with specific properties and values which you can actually go and inspect. Let’s say for example that you want to add a steel block and it should be similar to iron but a little stronger (take longer to mine), we can go and view what propreties and values has been used for a iron block.
Within IntelliJ, press the keybaord shortcut ctrl + shift + f (or go to the edit menu and choose Find -> Find in files), within the modal window that pops up, search for iron_block and make sure to set the file mask to Blocks.java and use Scope with Project and libraries. In the search results, double click the result that starts with public static final Block IRON_BLOCK = register("iron_block", and then you can see how it has been registered.
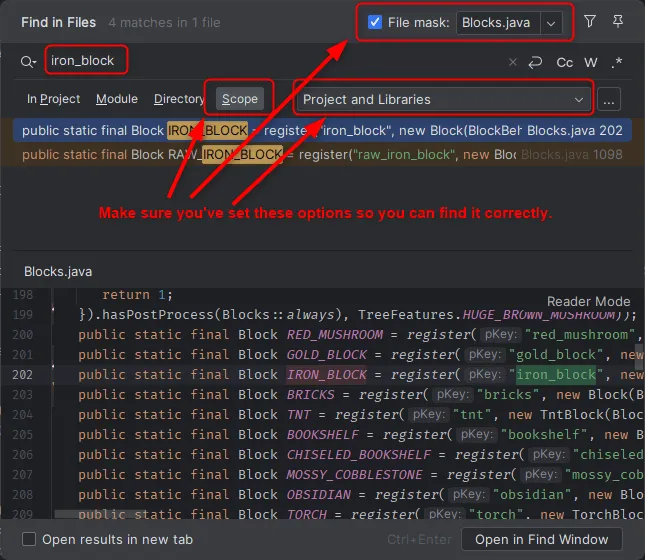
Here is a copy and paste of that line as it stands for me, you can see that it uses a strength with two parameters 5.0F and 6.0F.
public static final Block IRON_BLOCK = register("iron_block", new Block(BlockBehaviour.Properties
        .of(Material.METAL, MaterialColor.METAL).requiresCorrectToolForDrops()
        .strength(5.0F, 6.0F).sound(SoundType.METAL)));
}
Let’s register our steel block using the above as a template, but we’ll increase the strength values by one to make it slightly more resistent to explosions and take slightly longer to mine.
public static final RegistryObject<Block> STEEL_BLOCK = registerBlock("steel_block",
            () -> new Block(BlockBehaviour.Properties.of(Material.METAL).strength(6f, 7f)
                    .requiresCorrectToolForDrops().sound(SoundType.METAL)));
The requiresCorrectToolForDrops property means that this block can only be mined property by specific tools in order to drop items. For example you cannot mine a block of stone with a hoe. At this point we aren’t telling the game what tools have to be used, this will be covered by something called tags, which we will cover in a future tutorial; this does mean that if you place the block in the world right now, you will not be able to mine it yet.
Another tip is that if you want your block to be almost identical to another one in Minecraft, you can actually copy properties from an existing block and then use the property setter methods to tweak it. You can do this by using Block.Properties.copy(ANOTHER_BLOCK). All vanilla blocks can be accessed with Blocks.BLOCK_NAME_HERE so you can copy properties from one of them if you feel like it.
Just as we had to for the ModItems class, go into the mod main class and call the register method in the constructor just below the line where we are registering the items using ModItems.register(...).
public TutorialMod()
{
    ...
    ModItems.register(modEventBus);
    ModBlocks.register(modEventBus);
    ...
}
Assets
As with items, all blocks require some assets. They need textures, model JSON, a blockstates JSON and language entries, let’s start off by adding the translation and the textures in the same way we did for our items. However, since this is a block, all references to item needs to be replaced with block; this also includes putting them under assets/tutorialmod/models/block and assets/tutorialmod/textures/block this time.
You can get the steel block texture from here.
You should now have a texture PNG image at the following location /assets/tutorialmod/textures/block/steel_block.png. As well as a JSON file at the following location assets/tutorialmod/models/block/steel_block.json. The content this time for the model JSON is as follows:
{
  "parent": "minecraft:block/cube_all",
  "textures": {
    "all": "tutorialmod:block/steel_block"
  }
}
The parent minecraft:block/cube_all means that it’s a basic cube model whereby all faces use the same texture file which we specify with a key of all as you can see above.
You should have added a translation entry similar to this:
"block.tutorialmod.steel_block": "Block of Steel"Finally we need to add a blockstates JSON file. To do this, create a new folder under assets/tutorialmod called blockstates and within that folder a new JSON file called steel_block.json. The contents of this file should be:
{
  "variants": {
    "": {
      "model": "tutorialmod:block/steel_block"
    }
  }
}
This file tells the game what model(s) to use based on the block’s state (property values etc). For example you might have a different model based on whether there is another block next to it, or based on which direction it is facing etc.
If you were to run the game now, you should see that your block exists and it can be placed in the world. However, you would notice that the block item has no texture within your inventory or the creative tab, so what is going on here?
Earlier I mentioned that for every block that you want to be able to hold or put in your inventory, it needs a block item registered for it. When we registered our steel block we used our helper method that automatically registered our block item, however we need to setup an additional model JSON for this block item.
Within the assets/tutorialmod/models/item folder add a new JSON file called steel_block.json and set the contents to be the following:
{
  "parent": "tutorialmod:block/steel_block"
}
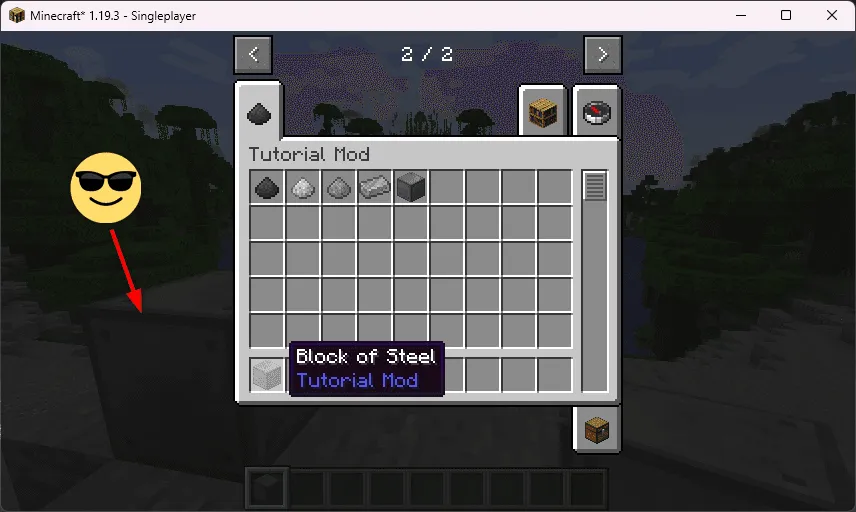
Now if you run the game, your steel block should now be textures and can be placed in the world; however you will not be able to mine it yet as we need to setup block loot tables in a future tutorial.
Using what we’ve learned
Now that we’ve added a new basic block to the game, let’s go ahead and use what has been larned to create the iron frame, steel frame and coal infused iron ore blocks as mentioned previously.
To add these blocks you need to remember to add the textures, block model JSON, blockstates JSON, block item model JSON, translations and add them to our ModBlocks class.
Coal infused iron ore
Block model JSON file assets/tutorialmod/models/block/coal_infused_iron_ore.json:
{
  "parent": "minecraft:block/cube_all",
  "textures": {
    "all": "tutorialmod:block/coal_infused_iron_ore"
  }
}
Block item model JSON file assets/tutorialmod/models/item/coal_infused_iron_ore.json:
{
  "parent": "tutorialmod:block/coal_infused_iron_ore"
}
Blockstates JSON file assets/tutorialmod/blockstates/coal_infused_iron_ore.json:
{
  "variants": {
    "": {
      "model": "tutorialmod:block/coal_infused_iron_ore"
    }
  }
}
Language entry in assets/tutorialmod/lang/en_us.json:
"block.tutorialmod.coal_infused_iron_ore": "Coal Infused Iron Ore"Add the texture PNG image file to assets/tutorialmod/textures/block/coal_infused_iron_ore.png. You can download it from here.
Lastly, add our new block to the ModBlocks class:
public static final RegistryObject<Block> COAL_INFUSED_IRON_ORE = registerBlock("coal_infused_iron_ore",
            () -> new DropExperienceBlock(BlockBehaviour.Properties.of(Material.STONE).requiresCorrectToolForDrops()
                    .strength(3.0F, 3.0F)));
For this block we’ve used DropExperienceBlock instead of just Block to indicate that this block should drop experience when successfully mined. You can take a look at the existing iron ore block that Minecraft adds to see that it is also done this way.
Iron frame
Block model JSON file assets/tutorialmod/models/block/iron_frame.json:
{
  "parent": "minecraft:block/cube_all",
  "textures": {
    "all": "tutorialmod:block/iron_frame"
  }
}
Block item model JSON file assets/tutorialmod/models/item/iron_frame.json:
{
  "parent": "tutorialmod:block/iron_frame"
}
Blockstates JSON file assets/tutorialmod/blockstates/iron_frame.json:
{
  "variants": {
    "": {
      "model": "tutorialmod:block/iron_frame"
    }
  }
}
Language entry in assets/tutorialmod/lang/en_us.json:
"block.tutorialmod.iron_frame": "Iron Frame"Add the texture PNG image file to assets/tutorialmod/textures/block/iron_frame.png. You can download it from here.
Lastly, add our new block to the ModBlocks class:
public static final RegistryObject<Block> IRON_FRAME = registerBlock("iron_frame",
            () -> new Block(BlockBehaviour.Properties.of(Material.METAL, MaterialColor.METAL).requiresCorrectToolForDrops()
                    .strength(4.0F, 6.0F).sound(SoundType.METAL)));
Steel frame
Block model JSON file assets/tutorialmod/models/block/steel_frame.json:
{
  "parent": "minecraft:block/cube_all",
  "textures": {
    "all": "tutorialmod:block/steel_frame"
  }
}
Block item model JSON file assets/tutorialmod/models/item/steel_frame.json:
{
  "parent": "tutorialmod:block/steel_frame"
}
Blockstates JSON file assets/tutorialmod/blockstates/steel_frame.json:
{
  "variants": {
    "": {
      "model": "tutorialmod:block/steel_frame"
    }
  }
}
Language entry in assets/tutorialmod/lang/en_us.json:
"block.tutorialmod.steel_frame": "Steel Frame"Add the texture PNG image file to assets/tutorialmod/textures/block/steel_frame.png. You can download it from here.
Lastly, add our new block to the ModBlocks class:
public static final RegistryObject<Block> STEEL_FRAME = registerBlock("steel_frame",
            () -> new Block(BlockBehaviour.Properties.of(Material.METAL, MaterialColor.METAL).requiresCorrectToolForDrops()
                    .strength(5.0F, 7.0F).sound(SoundType.METAL)));
Running our game again
This time, assuming all of the above has been completed successfully, we should now see all four of our basic blocks in our creative mode tab.
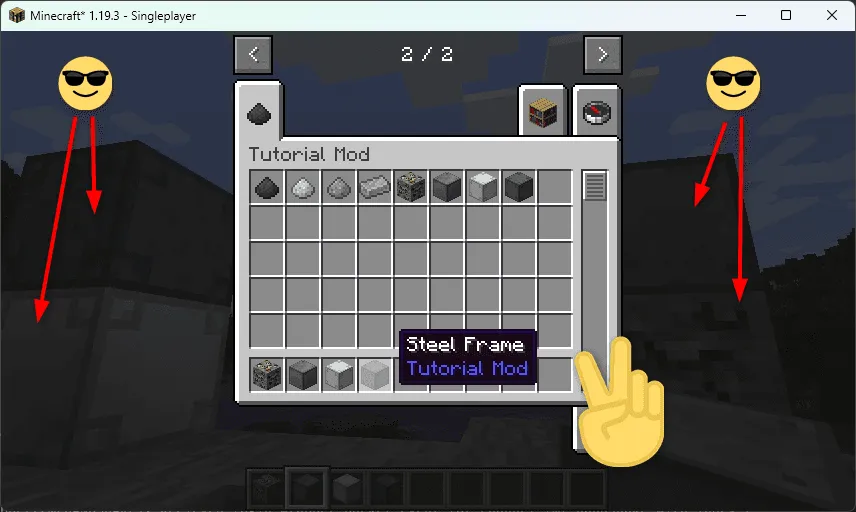
You can see the final state of the mod, as of the end of this tutorial, by going to my GitHub repository.
Parts in this series
Below are all of the other parts of this tutorial series.
Workspace setup
Learn how to setup your workspace for your new Minecraft 1.19 mod, using Forge, Java 17 and IntelliJ community.
Basic items
Learn how to create your very first basic items that will be used in future parts of this tutorial series.
Basic Blocks
Learn how to create your very first basic blocks that will be used in future parts of this tutorial series.
Data generators
Learn how to use data generators to automatically create your mod assets to avoid having to hand crank them each time.
Loot tables & tags
Learn how to drop one or more items when mining your blocks with loot tables and tags.
Share on social media platforms.
